
- Throne of Thunder
- Manaforge Omega
- MSV / HoF / ToES
- Liberation of Undermine
- Dragon Soul
- Nerub-ar Palace
- TotFW / BWD / BoT
- Ruby Sanctum
- Rotmire
- Imperator Averzian
- Vorasius
- Vaelgor & Ezzorak
- Fallen-King Salhadaar
- Lightblinded Vanguard
- Crown of the Cosmos
- Chimaerus the Undreamt God
- Belo'ren, Child of Al'ar
- Midnight Falls
- Immerseus
- Fallen Protectors
- Norushen
- Sha of Pride
- Galakras
- Iron Juggernaut
- Kor'kron Dark Shaman
- General Nazgrim
- Malkorok
- Spoils of Pandaria
- Thok the Bloodthirsty
- Siegecrafter Blackfuse
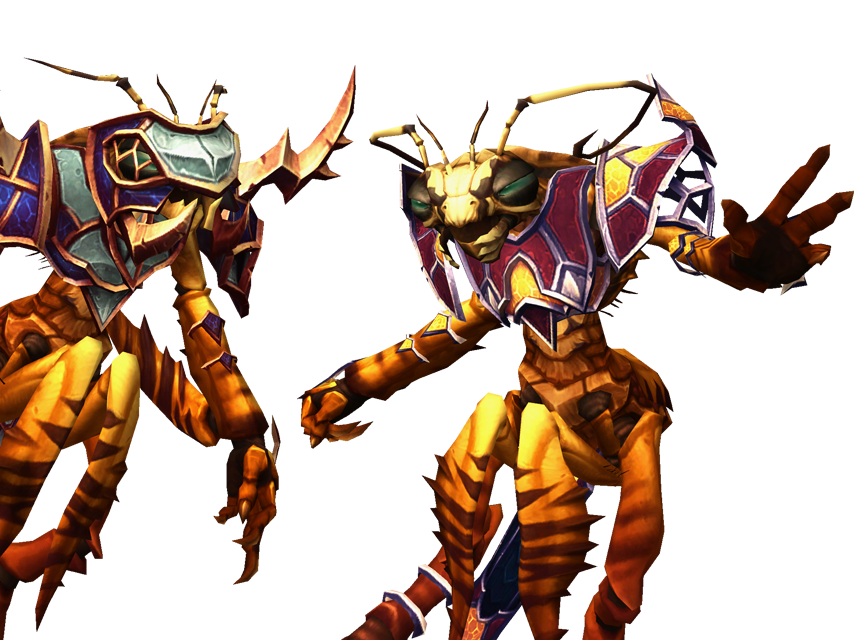
- Paragons of the Klaxxi
- Garrosh Hellscream
- Jin'rokh the Breaker
- Horridon
- Council of Elders
- Tortos
- Megaera
- Ji-Kun
- Durumu the Forgotten
- Primordius
- Dark Animus
- Iron Qon
- Twin Empyreans
- Lei Shen
- Ra-den
- Plexus Sentinel
- Loom'ithar
- Soulbinder Naazindhri
- Forgeweaver Araz
- The Soul Hunters
- Fractillus
- Nexus-King Salhadaar
- Dimensius, the All-Devouring
- The Stone Guard
- Feng the Accursed
- Gara'jal the Spiritbinder
- The Spirit Kings
- Elegon
- Will of the Emperor
- Imperial Vizier Zor'lok
- Blade Lord Ta'yak
- Garalon
- Wind Lord Mel'jarak
- Amber-Shaper Un'sok
- Grand Empress Shek'zeer
- Protectors of the Endless
- Tsulong
- Lei Shi
- Sha of Fear
- Vexie and the Geargrinders
- Cauldron of Carnage
- Rik Reverb
- Stix Bunkjunker
- Sprocketmonger Lockenstock
- One-Armed Bandit
- Mug'Zee, Heads of Security
- Chrome King Gallywix
- Morchok
- Warlord Zon'ozz
- Yor'sahj the Unsleeping
- Hagara the Stormbinder
- Ultraxion
- Majordomo Staghelm
- Spine of Deathwing
- Madness of Deathwing
- Ulgrax the Devourer
- Bloodbound Horror
- Sikran, Captain of the Sureki
- Rashanan
- Broodtwister Ovinax
- Nexus Princess Kyveza
- Silken Court
- Queen Ansurek
- Conclave of Wind
- Al'akir
- Omnotron Defense System
- Magmaw
- Atramedes
- Chimaeron
- Maloriak
- Nefarian
- Halfus Wyrmbreaker
- Valiona & Theralion
- Ascendant Council
- Cho#gall
- Sinestra
- Kazzara
- The Amalgamation Chamber
- The Forgotten Experiments
- Assault of the Zaqali
- Rashok, the Elder
- Zskarn
- Magmorax
- Echo of Neltharion
- Scalecommander Sarkareth
- Lord Marrowgar
- Lady Deathwhisper
- Gunship Battle
- Deathbringer Saurfang
- Festergut
- Rotface
- Professor Putricide
- Blood Prince Council
- Blood-Queen Lana'thel
- Valithria Dreamwalker
- Sindragosa
- The Lich King
- Halion
- Northrend Beasts
- Lord Jaraxxus
- Faction Champions
- Twin Val'kyr
- Anub'Arak
Siege of Orgrimmar
Paragons of the Klaxxi
战术攻略
The raid fights 9 different bosses in this encounter, with only 3 active at a time.
Every time you kill a boss, a new one spawns, and all currently active are fully healed and gain a damage buff.
Recommended Kill Order: Skeer > Rik'kal > Korven > Hisek > Xaril > Iyyokuk > Kaz'tik > Kil'ruk >Ka'roz
Skeer summons an additional Blood.
Players must kill a Parasite to remove the Scorpion form from Rik'kal.
Korven's Encase in Amber is no longer killable by the raid.
Hisek gains Rapid Fire.
Xaril Catalyst's now target 2 different injection colours rather than just 1.
Insane Calculation from Iyyokuk spawns additional lines. The Paragon power selects class instead of race.
Kil'ruk gains Reave.
The damage buff comes every 50 seconds rather than when a boss dies.
非常感谢 Pit & Jeri 作为中文文本的编辑所做的出色工作。
These abilities are shared by all the Paragons.

Whenever a boss is defeated, all other active bosses heal to full and a gain 8% damage buff.

The boss that will be activated next will have the Ready to Fight aura.
Whenever a boss is defeated, all other active bosses heal to full and a gain 8% damage buff.
The boss that will be activated next will have the Ready to Fight aura.
Skeer should be the raid's first target. With enough damage, their unique mechanic of Bloodletting can be ignored.
EVERYONE
NUKE SKEER

Skeer attacks the tank, dealing 10% of their health and summoning Bloods around the room.
If the Bloods reach a Paragon, they heal the boss depending on their remaining health percentage.
These are stunnable and slowable.
If you have enough DPS and are killing Skeer first, you can ignore the Bloods and just hit the boss.

Skeer applies a stacking debuff that increases damage taken from Rik'kal.
This means no tank should have both Skeer and Rik'kal.
A DPS player can take this Paragon Power which gives a 10 second buff that causes your attacks to spawn blood orbs for 30 sec.
Walking into these orbs will heal a player for 10% of their max health.
Use Rik'kal's Amber Scorpion to deal massive damage.
TANKS
OPTIMIZE YOUR SCORPION DAMAGE

Rik'kal turns the current tank into a Scorpion every 30 seconds for 20 sec, dealing periodic damage to them.
Players will have the following abilities available to them:
Claw: deals damage to 1 enemy
Swipe: deals damage to several enemies
Sting: puts a DoT on 1 enemy
Prey: instantly kill an Amber Parasite.

A 12 seconds debuff is applied to the tank that will spawn an Amber Parasite upon expiration.
Having active mitigation up when this expires prevents the add from spawning.
Rik'kal applies a stacking debuff that increases damage taken from Skeer.
This means no tank should have both Rik'kal and Skeer.
Amber Parasites regenerate 100% of their health every 10 seconds.
They can be killed with Prey from an Amber Scorpion.
Any player can take this Paragon Power.
This gives the ability to turn into a Scorpion for 30 seconds.
While in this form, the damage scaled with attack power and as such should be used by a tank with Vengeance.
A 12 seconds debuff is applied to the tank that will spawn an Amber Parasite upon expiration.
Having active mitigation up when this expires prevents the add from spawning.
Amber Parasites regenerate 100% of their health every 10 seconds.
They can be killed with Prey from an Amber Scorpion.
Rik'kal applies a stacking debuff that increases damage taken from Skeer.
This means no tank should have both Rik'kal and Skeer.
Any player can take this Paragon Power.
This gives the ability to turn into a Scorpion for 30 seconds.
While in this form, the damage scaled with attack power and as such should be used by a tank with Vengeance.
Bait the Encase in Amber before killing Korven.
Ensure tanks are in position to tank swap when Korven casts Shield Bash.
BRING A BOSS TO 50%
THEN NUKE KORVEN

Korven will cast Encase in Amber on himself or any boss that reaches 50% health while he is active, healing them to full health if not destroyed in 10sec.
This ability has a 30 seconds cooldown.

The primary tank will be knocked down and stunned for 6 seconds, followed up by a Vicious Assault.
Vicious Assault is a frontal cleave that comes in 6 strikes that deal ramping damage.
As Shield Bash is happening, the other Tank can taunt the boss to prevent the stunned Tank being hit by Vicious Assault.

A Tank player can take this Paragon power, giving them a 5 second damage immunity on-use with their Extra Action Button.
The primary tank will be knocked down and stunned for 6 seconds, followed up by a Vicious Assault.
Vicious Assault is a frontal cleave that comes in 6 strikes that deal ramping damage.
As Shield Bash is happening, the other Tank can taunt the boss to prevent the stunned Tank being hit by Vicious Assault.
A Tank player can take this Paragon power, giving them a 5 second damage immunity on-use with their Extra Action Button.
Hisek's main abilities are Rapid Fire and Aim.
EVERYONE
DODGE ORBS

Hisek shoots out waves of orbs in all directions that deal massive Physical damage.
Each successive wave of fire gains more speed.
EVERYONE
DEAL WITH AIM

Hisek selects a random player. If they are within 45 yards of Hisek, they are knocked back.
He then casts Fire at them, dealing millions of Physical damage that is shared to all between them and the target.
This can either be soaked, or the player targeted can use their defensive cooldowns and take an external cooldown.
Run away if targeted, use your cooldowns and be sure not to hit anyone else.

Hisek shoots a few random players in the raid, dealing some Physical damage.
A DPS player can take this Paragon power which gives them the ability Snipe.
This will do more damage the further it is cast from the target and afflict Marked for Death, increasing the targets damage taken by 15% for 10 sec.
Watch your color and react accordingly when Xaril chooses a Catalyst.

When Xaril becomes active, every player will be injected with one of 3 coloured toxins: red, blue, or yellow.
Xaril will cast a random Catalyst color on the raid which has a reaction dependant on the color debuff that the player has.
Catalyst: Red - Players with red toxin will deal Fire damage to themselves and all players within 10 yards. Spread out.
Catalyst: Blue - Players with blue toxin will take massive Frost damage that can be split amongst max players within 10 yards.
Catalyst: Yellow - Players with yellow toxin has Clouds of Noxious Vapors spawn under them, which persist for 30 seconds and deals Nature damage per sec.
Healers can click Xaril's corpse to gain Vast Apothecarial Knowledge.
This grants them the ability Volatile Poultice.
While active, all healing done causes the target to receive a buff that 'stores' healing until they next take damage.
This has a 30-second cooldown, and lasts for 10 seconds.

Xaril applies a stacking debuff that increases damage taken from Kil'ruk.
This means no tank should have both Xaril and Kil'ruk.
When Xaril becomes active, every player will be injected with one of 3 coloured toxins: red, blue, or yellow.
Xaril will cast a random Catalyst color on the raid which has a reaction dependant on the color debuff that the player has.
Catalyst: Red - Players with red toxin will deal Fire damage to themselves and all players within 10 yards. Spread out.
Catalyst: Blue - Players with blue toxin will take massive Frost damage that can be split amongst max players within 10 yards.
Catalyst: Yellow - Players with yellow toxin has Clouds of Noxious Vapors spawn under them, which persist for 30 seconds and deals Nature damage per sec.
Xaril applies a stacking debuff that increases damage taken from Kil'ruk.
This means no tank should have both Xaril and Kil'ruk.
Healers can click Xaril's corpse to gain Vast Apothecarial Knowledge.
This grants them the ability Volatile Poultice.
While active, all healing done causes the target to receive a buff that 'stores' healing until they next take damage.
This has a 30-second cooldown, and lasts for 10 seconds.
Watch your raids health to not get oneshot by Diminish!
EVERYONE
SPREAD OUT

A random player will be targeted and one or all of their assignments from Calculate selected.
A line of fire will be drawn between each player with that same assignment.
Players targeted should make an effort to spread around as much as possible while others should make sure to avoid standing in any of the lines.

Iyyokuk assigns every player with a random shape, color, and number.
Shapes: Mantid, Sword, Staff, Sonic Ring, Amber.
Colors: Red, Purple, Blue, Green, Yellow
Numbers: 1-5
A healer can take this Paragon power, giving them the ability to heal a player, and this is copied to any raid members who share their race.

Iyyokuk deals 34% of a random players health.
If the player is below 25% health, they will instantly die.
Iyyokuk assigns every player with a random shape, color, and number.
Shapes: Mantid, Sword, Staff, Sonic Ring, Amber.
Colors: Red, Purple, Blue, Green, Yellow
Numbers: 1-5
Iyyokuk deals 34% of a random players health.
If the player is below 25% health, they will instantly die.
A healer can take this Paragon power, giving them the ability to heal a player, and this is copied to any raid members who share their race.
Kaz'tik will spawn Hungry Kunchongs, watch out!
EVERYONE
DEAL WITH KUNCHONGS

Kaz'tik spawns Hungry Kunchongs around the room.
These will pull players in using Devour, gaining 5 energy per seconds and dealing Physical damage.
The raid must swap to the Kunchong until 30% of it's health is dealt in order to stop the Feeding and free the targeted player.
If a player gets too close, they will be killed instantly by Devour Whole.
While not Feeding, the Kunchong will be immune to all damage through use of Thick Shell.
If a Kunchong reaches full energy, it will Molt and transform into a Mature Kunchong.
This evolved Kungchong will begin to use Swipe, dealing high Physical damage as a frontal.
EVERYONE
AVOID THE RINGS

Kaz'tik shoots Sonic Rings towards a random player dealing massive Physical damage to any hit.

Any player can take this Paragon power, giving them the ability to summon an Immature Kunchong to fight for them for 40 seconds.
Any player can take this Paragon power, giving them the ability to summon an Immature Kunchong to fight for them for 40 seconds.
Kil'ruk uses various abilities such as Death from Above.
Make sure to spread and run away when needed.
EVERYONE
SPREAD OUT

Kil'ruk leaps into the air over a random player and crashes down, dealing Physical damage to all players within 8 yards.

Kil'ruk applies a stacking debuff that increases damage taken from Xaril.
This means no tank should have both Kil'ruk and Xaril.

A DPS player can take this Paragon power, giving them the ability to leap forward and deal Physical damage within 10 yards.
This ability can be used to break the Thick Shell of a Hungry Kunchong.
Ka'roz is the final Paragon if you're following the recommended kill order.
He charges around the room, and Hurls Amber from above.
EVERYONE
SPREAD OUT

Ka'roz charges around the room, targeting random players.
Any hit suffer from Whirling, dealing Physical damage and spinning them around for 4 sec.
Any players in close proximity to those hit also receive the damage portion of Whirling.
EVERYONE
DON'T STAND IN AMBER

Ka'roz jumps onto one of the platforms, throwing Amber that leaves a Pool.
Any player that stands in the Pool will take Nature damage every second from Caustic Amber.

A DPS player can take this Paragon Power, which gives them the ability to leap to one of the platforms Ka'roz hurled Amber from.
If there is an Amber at the platform, the player will be able to throw it down, causing an Amber Explosion.
This can also be used to destroy Korven's Encased in Amber.
Once done (or if there is no Amber present), the player will automatically return to the main level.
